TABLE TENNIS / BACKHAND PRACTICE / DAY 1
Learning from Fan Zhendong, Day 1
I put my table tennis backhand next to Fan Zhendong’s. My first takeaway was about my ready position.
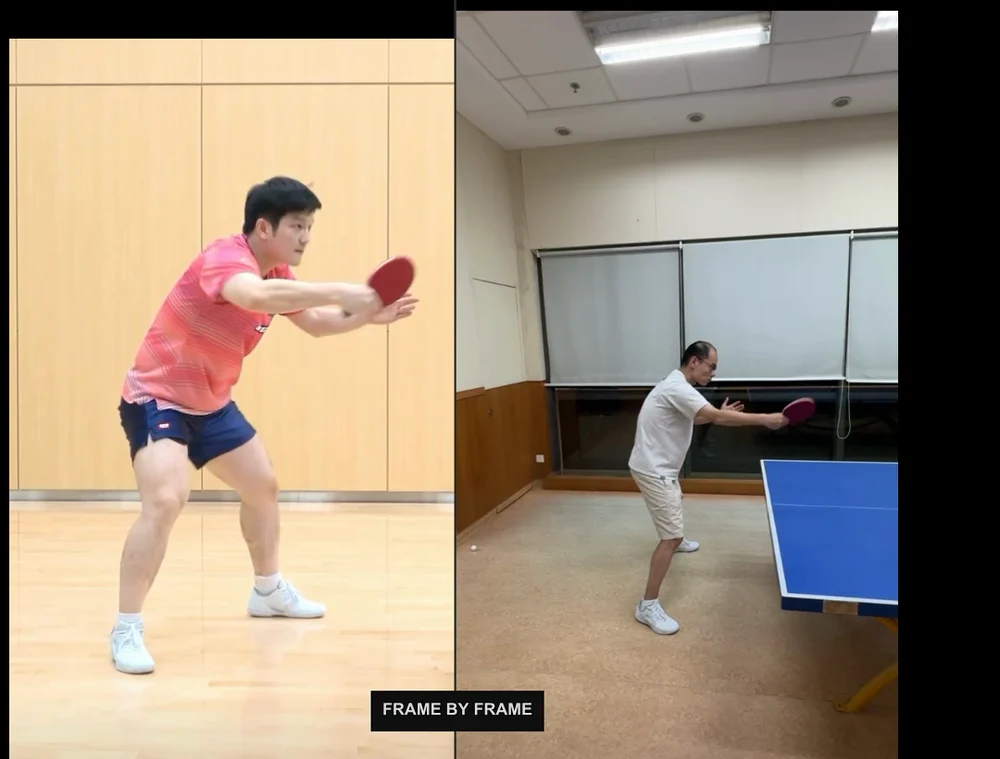
I wanted Fan Zhendong as my table tennis coach. So I built an app. That’s the playful opening of my Day 1 video: I’m using his technique as a reference and comparing it with my own footage, rather than taking a lesson from him in person.
This is the first day of reviewing my backhand this way. I wanted to turn a vague feeling that my stroke looked different into something specific I could work on. The first clue was my ready position: I looked too upright, with less bend in my knees and my hips staying higher.
Sync the videos, then change the viewing angle
I started by placing the two clips side by side in Duolian and playing them in sync. Continuous playback lets me follow the rhythm of the movement. Scrubbing frame by frame gives me time to look at the position of my body and arm. When comparing, I need to pay attention to the phase of the stroke: a ready position and a contact frame are different moments.
The problem is that the clips were recorded from different camera angles. Perspective, distance and body orientation all change how a movement looks on screen. In a flat video, it can be difficult to tell how much of a difference comes from posture and how much comes from the camera.
That’s why I added 3D body comparison. I can overlay the reconstructed bodies on the original footage, then switch to a 3D view and rotate the models to a comparable viewing direction. This gives me another way to inspect the movement, with the original footage still there to check my interpretation.
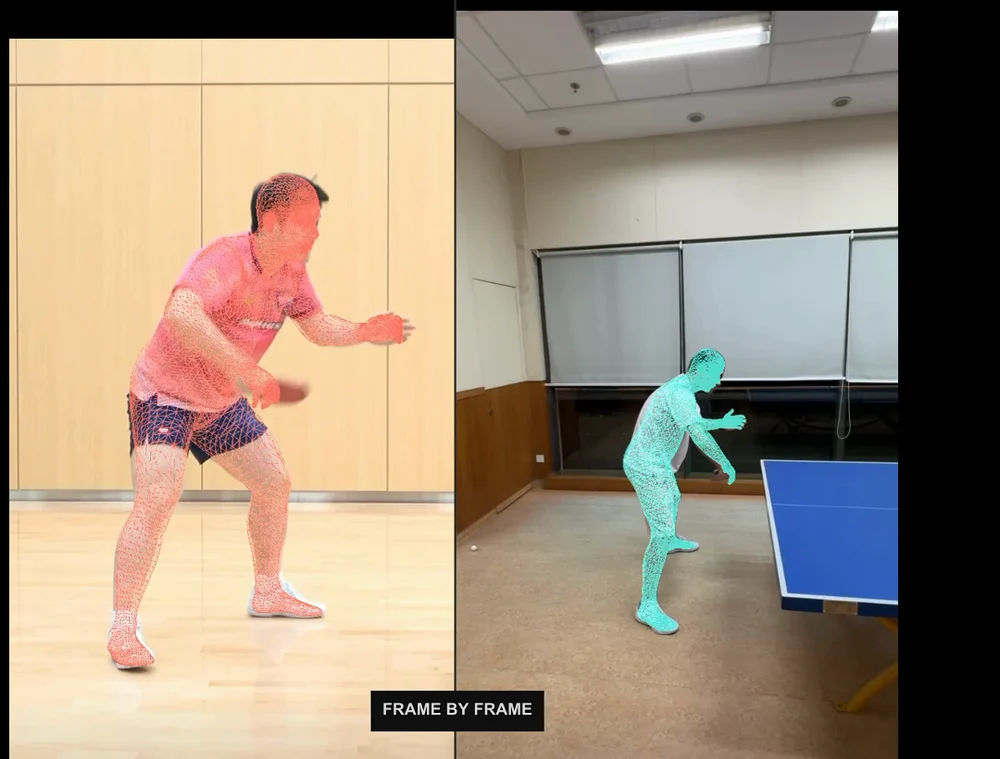
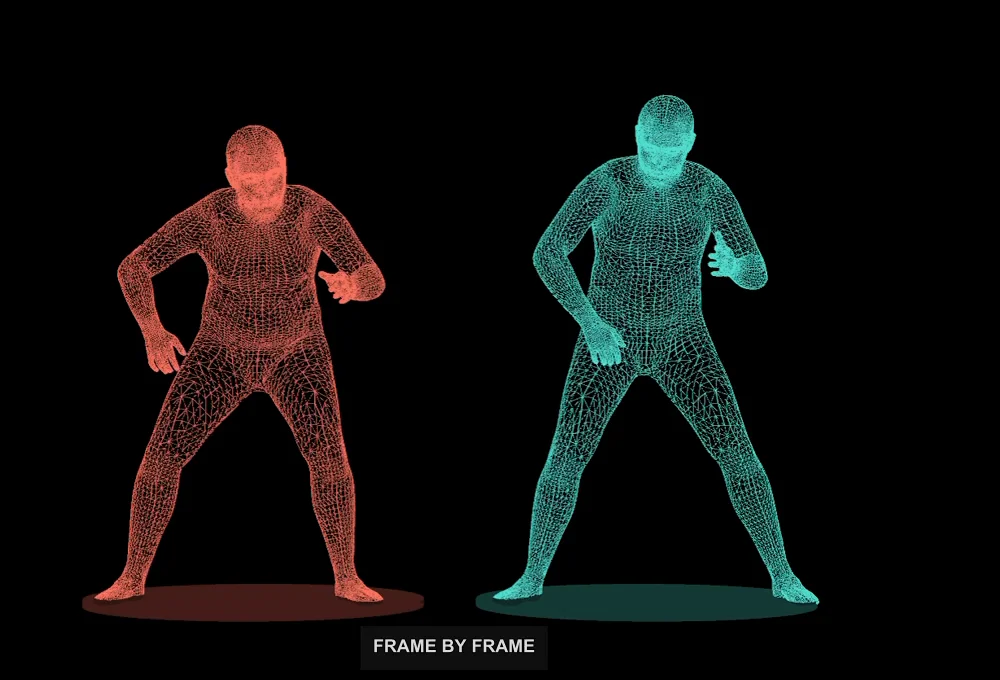
From the front: I’m standing too tall
In the front view, the first thing I noticed was how upright I looked. In the ready position shown here, my knees appeared less bent than in the reference. Removing the different backgrounds made it easier for me to focus on the overall shape of the stance.
That was enough to give me a practice question: am I getting into the ready position I intend to use? I haven’t measured a knee angle or found a number everyone should copy. This is a visual observation about my footage that I want to check in the next session.
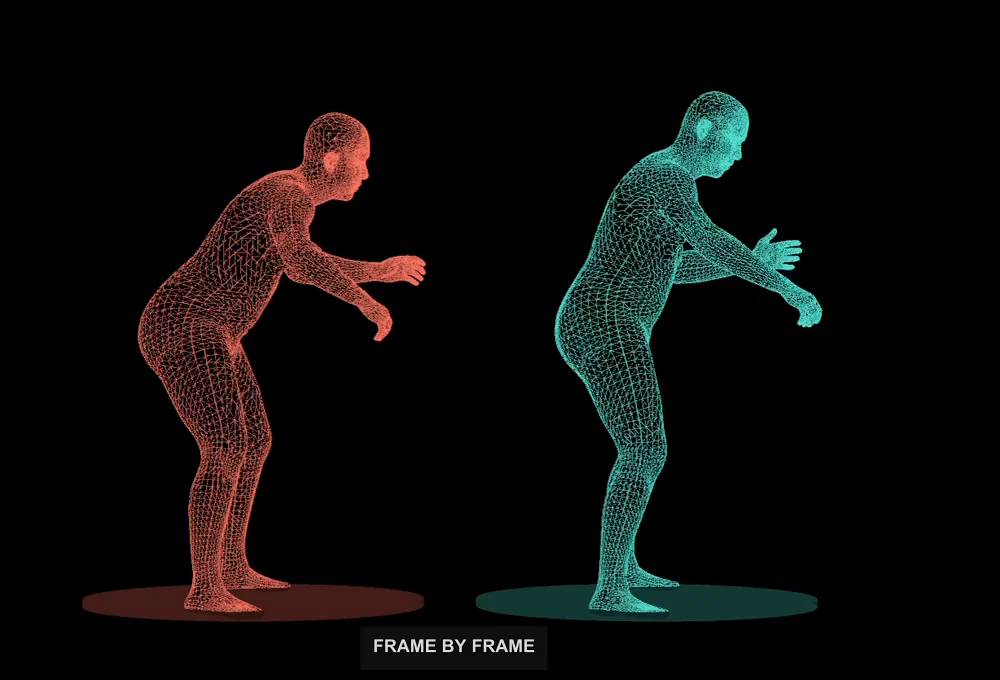
From the side: higher hips, more arm reach
Rotating to the side gave me another clue. In this view, my hips stayed higher while my arm reached farther forward. Watching only the racket had made it easy to overlook that relationship between my body and my hand.
A still image cannot explain the whole stroke or tell me how good the resulting ball was. The 3D bodies are estimates from video, and both reconstruction errors and differences in stroke timing can affect the comparison. I use this view to find details worth revisiting in the original clips.
One focus for Day 1: bend my knees and sit my hips back
My cue for the next practice is simple: bend my knees and sit my hips back. I want to get the ready position right, then work on coordinating my body and arm. Keeping one focus gives me something specific to look for when I record again.
If you want to review your own table tennis backhand on video, the following workflow is a useful starting point. It is also the sequence I plan to follow for my next recording and review.
Keep the whole body in frame
Use a stable camera position that shows your feet, knees, hips and racket arm. For the next recording, keep the angle and practice conditions as similar as practical so the comparison is easier to interpret.
Watch the rhythm, then match the phase
Play the clip through first. Then scrub to a corresponding ready position or backswing. If camera angles make comparison difficult, use a 3D view as an additional perspective and check it against the original footage.
Choose one practice focus
Mine is the ready position. I’m reminding myself to bend my knees and sit my hips back, without trying to make my body look identical to a professional player’s.
Record again and compare with yourself
Place the next clip beside Day 1. Check whether the specific thing you practiced has changed before adding another focus.
The app helps me see. Practice has to do the rest.
One reason I’m building Duolian is to turn “something feels off” into footage I can inspect, discuss and revisit. In this session, synchronized playback, frame-by-frame review and 3D body comparison helped me find a concrete starting point.
Day 1 ends with a plan, without a claim that my backhand has already improved. Next time I record, I’ll check whether I can maintain a more suitable ready position, then keep looking at how my body and arm work together.
Take a closer look at your own training
Explore video comparison and 3D body comparison in Duolian for iOS, and find a specific detail to work on in your next session.
Explore Duolian for iOS